Showing posts with label arts and crafts. Show all posts

Tuesday, May 14, 2013

Crafty Kids: Tie-Dye Butterfly

Since for March Crafty Kids I did a caterpillar craft, for April I decided that it would be fun to make a butterfly.  First I tripped over this and thought it was pretty much the greatest thing ever.  I also found another version that included a clothes pin for the butterfly body which I had left over from the caterpillar craft.  Unfortunately the link for that craft has since been deleted so I can't post that piece of inspiration.  

I did cover the tables with plastic table cloth before hand, had lots of napkins on hand and I was able to get inexpensive spray bottles for tiny fingers by shopping in the travel section at Bed, Bath and Beyond.  The kids loved the project and two grandmothers ended up asking me if they could make butterflies too which was great.  The coffee filters didn't take long to dry although I admit to speeding up the process by hanging clothes pinning them to my desk handles so they would dry even faster.  I had coloring sheets on hand for the kids to work on while they waited for their butterflies to dry.  


Materials:


Coffee filters
Markers
Spray Bottle w/ water
Pipe Cleaners
Clothespin (optional)
Magnet Tape (optional)

1.  Color your coffee filter with markers.  Make crazy patterns but remember that everything is going to blur a little bit.  (Note:  If the markers you’re using are drying out the colors will not run as much later)

2.  Lay the coffee filter on top of a plastic tablecloth or layer of paper towels and spray 2-3 spritzes of water on to the coffee filter.  Allow coffee filter to dry.  (You can leave it laying flat but it dried faster when I hung it to dry.)

3.  (Version 1)  Pinch the coffee filter in the middle and use a clothespin to keep it pinched.  Fluff the wings if they look too scrunched.  Wrap a pipe cleaner around the top of the clothespin leaving the ends free to bend into antennae.  If you want to turn this one into a magnet you can put a strip of magnet tape on the back of the clothespin.  

(Version 2)  Pinch the coffee filter in the middle.  Fold the pipe cleaner in half and stick the pinched coffee filter in the middle.  Twist the top of the filter a few times leaving the ends free to bend into antennae.

Tuesday, April 30, 2013

Crafty Kids: Caterpillar Magnet

For March's Crafty Kids program I recreated a craft that I saw for sale as a kit in a catalog many months ago. (Unfortunately I don't remember which one.)  The original craft called for gluing pom poms directly onto a clothes pin, adding googly eyes to the front on and then sticking magnet tape to the other side of the clothes pin.  I felt like the kit was a little too expensive and that all the supplies could be purchased for less then the cost of a kit for 12 kids.  Then I came across the blog Walk in the Sun, and really liked how they added the leaf so that there would be more surface area for the gluing of the caterpillars.  At the library we have Ellison machines that will cut massive quantities of simple shape easily as long as we have the stencil for it, so I had one of the pages cut the leaves with the Ellison machine ahead of time.


Caterpillar Magnet
Supplies:
1 clothes pin
Magnet tape
1 card stock leaf
6 small pom poms (I used 3/4 inch pom poms)
1 large pom pom (I used a 1 inch pom pom)
2 wiggle eyes
Markers
glue

1.  Glue your 2 wiggle eyes to your large pom pom.  This is the front of your caterpillar

2.  Draw a leaf pattern onto your cardstock leaf while you wait for your wiggle eyes to dry

3.  Glue your pom poms onto your green leaf; leaving the face for last.  

4.  Get a piece of magnet tape and stick it to your clothespin while giving your caterpillar a little time to dry.

5.  Once your caterpillar is mostly dry glue your leaf onto your clothes pin.  

Tuesday, April 23, 2013

Crafty Kids: CD Fish Mobile

For February's Crafty Kids program I decided to make fish mobiles out of old cds.  I don't know where I originally saw the craft but I thought it was adorable and couldn't wait to do it.  We have tons of cds and dvds at the library that get so scratched that they can no longer be played, as they get taken out of circulation we save them in the back for arts and craft.  
I made 4 sets of cardboard fin and mouth templates from a cardboard box using the templates from a similar craft on DTLK Crafts for Kids site.


CD Fish Mobile
Materials:

2 old cds or dvds
construction paper
fish fin templates
googly eyes
permanent markers
glue sticks
hot glue gun
yarn

1.  With a permanent marker draw on the shiny side of the cds to decorate your fish.  *see note*

2.  Select up to 5 colors of construction paper.  Use the fish fin and mouth  templates to trace and cut out a set of lips, a fishtail, two large fins and a small fin.  Cut a rectangle out of the construction paper as well using the white sheet provided as a template (should be a quarter of the size of an 8.5 x 11 sheet of paper).  You may also cut small round circles to mount your googly eyes on (Make sure you cut them out bigger than your googly eyes so they can be seen.  *see note*

3.  Fold the rectangle sheet of paper the same way you would fold a piece of paper if you were making a fan.  Make sure you fold it small enough that it will fit through the holes in your cd.

4.  Using your glue stick glue all the fins (except for one large fin) to the undecorated side of one of the cds.

5.  Using your glue stick glue your second large fin in the same place you glued your first large fin on the second cd.  

6.  Get a piece of yarn and knot together the two ends.

7.  Bring your cd fish up to the front.  The librarian will glue help you thread your yarn and glue the two cd’s together with a hot glue gun.  

8.  Glue your googly eyes and construction paper circles onto the cd fish.  One on each side more or less in the same place.  

9. Thread your folded up sheet of paper through the hole in one of the cds.

*Note*:  Steps 1 and steps 2 & 3 are interchangeable.  While some kids are tracing their fins you can have others begin decorate their cds.


Tuesday, April 16, 2013

Story Time: Letter G

I got to do two story times in a row and was able to follow the Letter F up with the Letter G.  I had seen an adorable G is for Goose as part of a full alphabet book a mother made with her daughter.  It was so simple and adorable I couldn't resist.  Since I was a little intimidated by the idea of drawing my own goose parts I borrowed both the feet and the tail templates from this goose paper craft from DLTK Kids and just drew a simple triangle for the beak.  I decided to draw some flowers in the background so that our gooses could hang out in the garden.  Next time I do this craft I'm going to make the page horizontal so that there is more room for the garden.


After the previous weeks alphabet book fail I decided to go without an alphabet book this time.  I decided that I was only going to do 3 books and picked two funny goose stories and one nice/gorgeous garden book:

Silly Suzy Goose by Petr Horáček

My Garden by Kevin Henkes

Gordon in Charge by Jill Newton

I'm going to be honest and say that I'm not sure all the children got the joke at the end of Gordon in Charge however I think the parents got a big chuckle out of the ending.  When we were reading Silly Suzy Goose I had all the kids pretend to be different animals with Suzy and they all had a lot of fun with the different actions.  Without the alphabet book it felt like it was harder for the kids to see the connection between our stories and Letter G is for Goose craft.  In the future when I do the alphabet craft and can't find an alphabet story I like to go over the letters with I am going to try to remember to point out the letter G in the titles and talk about how different characters and items start with the letter G.  For our songs we did do the Alphabet song, Old McDonald Had a Farm and my favorite, the Hokey Pokey.  

Tuesday, April 9, 2013

Tween/Teen Crafts: Upcycled T-Shirt Scarves

One of my favorite go to crafts for tween girls is the Recycled T-Shirt Scarf.  For my purposes I usually go 4th-6th grade on this, however at a recent parental request the next time I do this I will be including 3rd graders with a adult present.  I've also had success with special needs girls and a parent.  When I advertise the program I do request that each child bring an old adult XL t-shirt from home, however I usually also will go through my things just before and bring a couple of extra t-shirts from home because someone ALWAYS forgets.

I originally found this craft on Cut Out + Keep.  Cut Out + Keep is also one of my favorite crafting sites.  Membership is free and you can post all different kinds of crafty projects and check out crafty projects posted by others.

I like a long skinny scarf so that's the one I made, but there can actually be quite a bit of variation.  The instructions for the T-Shirt scarf can be found here.

Tuesday, April 2, 2013

Story Time: F is for Fish

My coworker did the letter E so it was now my turn to do letter F.  I poked around my usual websites and couldn't find anything that I felt worked for me.  Then I found a new blog that featured alphabet crafts Miss Maren's Monkeys and they had this amazing F is for Fish craft that INCLUDED templates.  I don't know if I've mentioned this before but templates really make things so much easier.  I did make myself a page of fish eyes so that I would only have to cut out one circle for each eye rather then 2 and so that I would feel like I was wasting less paper.  I also ended up not cutting out the seaweed and bubbles mainly because I thought the kids might like to do their own.  I handed out crayons to the kids and they added their own seaweed, air bubbles and background fish.


While I was able to find many story books for my F is for Fish story time I was very surprised that I could not find a fish or undersea alphabet book for a young child.  I found many versions that were clearly for older readers with complicated scientific vocabulary that I knew wasn't going to work for my preschoolers; so I went with a different alphabet book.  I ended up going with:

Hooray for Fish by Lucy Cousins

Fidgety Fish by Ruth Galloway

The Animal ABC by Leslie A. Baker

Hooray for Fish is an extremely interactive book.  There were all different kinds of silly fish to identify and there was counting to be done so I had the kids help me identify the fish and help me count.  I also had the kids help me figure out the different animals for each page of The Animal ABC.  With two very active books I found that time passed more quickly then I expected it to.  We sang If You're Happy and You Know It and the Hokey Pokey and called it craft time.  


Tuesday, March 26, 2013

Teen Craft/All Ages Program: Angry Birds!

So two summers ago a friend of mine who works in another library held a scyfy/anime/general geekery convention for her library.  She asked me to please come an do a booth and I had been dying to do this Live Action Angry Birds craft/game that I saw on 4YA: Inspiration for Youth Advocates which is a blog hosted by a girl I went to library school with.

After watching this video:

I was intimidated by the idea of trying to make birds and pigs all day and keep the booth moving so I decided to make it a carnival game.  I made several birds and pigs ahead of time using the method in the video.  


Then I had my husband help me make two slingshots out of wire hangers, rubber bands and fabric from an old pair of pajama pants.  We got the idea from the book Mini Weapons of Mass Destruction: Build Implements of Spitball Warfare.  I thought about using the rubber bands the way they did in the video however as this was an all day event I felt like if I encouraged kids to launch things with rubber bands the entire staff would be paying for it all day.  I also thought the slingshots were a little more authentic and they made it tougher too.  It was surprising how quickly some people got the hang of the sling shot and how others were just never able get the hang of it.  All in all people seemed to enjoy seeing one of their favorite games come to life.  


I did a second convention at another carnival a few months later and all of the supplies held up although two seemed to be the limit as the birds and pigs started looking a little bit bedraggled and one of my sling shots began needing repairs every few Teens.  

I plan on doing this again sometime in the near future as a program where each kid will make their own bird and piggy and possibly slingshot....depending on how I think the parents will handle that.  It was definitely a lot of fun and I can't wait to do it again.

Tuesday, February 26, 2013

Saturday Story Time: Robots

Saturday Story Times tend to have a slightly more complicated craft because they include children up to second grade.  For my first Saturday Story Time I went with a robot theme.  Originally I had intended to have the kids make their own robots out of paper towel tubes, paint and tin foil down in our large meeting room.  However, due to Super Storm Sandy FEMA camped out in our meeting room since November 1st and was still there at the beginning of January so I moved my program upstairs to our picture book area.  I was a little uncomfortable painting in our picture book area so I decided to work up something new.


I decided to make robot costumes.  I had my coworkers and parents bring in their brown bags from the grocery store.  I cut a slit up the back, arm holes a head hole and then very carefully turned the bags inside out so that all the logos were on the inside.  I gave the kids tinfoil, crayons, foam shapes, sequins, jewels and feathers.  They all created amazing costumes.  (Note that this is the costume I made and it is my very skinny adult sister modeling it, the costumes will fit the kids better.)

For the story time portion I had only three books planned since I wanted to give the kids plenty of time to decorate their costumes.

Boy + Bot by Amy Dyckman

Robot Zombie Frankenstein! by Annette Simon

Hello Robots by Bob Staake

I had two squirmy boys show up on time for my story time. After reading Boy + Bot I felt like they were just not feeling stories. I asked them if they wanted to try a robot song to get the wiggles out or if they wanted to start working on their costumes. The boys really wanted to get started on costumes. When my late arrivals showed up 10 minutes later, they were disappointed to have missed the stories so I did send them home with some of my robot books. As much as I was sorry to skip some of the stories a lot of the kids did spend more than 45 minutes on their costumes. Everyone's costumes came out colorful and fun.


Tuesday, February 19, 2013

Teen Craft: Constellation Wall Art Craft

Last summer's Summer Reading Club theme was Own the Night, so when I came across How to Build a Constellation Light for a Little Astronomy in the Bedroom on the Offbeat Home blog I immediately tried to figure out how to simplify it for a Teen program.

Pre-Cut Black Foam Board (the pieces should make a rectangle that can be sealed, w/ one side shortened to feed the cord out)
Tracing Paper
A String of Clear Christmas Lights
X-Acto Knife (for the grown ups)
Hot Glue Gun
Silver Sharpie
Ruler
Blown Up Photocopies of Popular Constellations (we did the ones everyone knows and the astrological signs)
Scotch tape & Duct Tape
Extension Cord

1.  Have teens select their constellation and trace over the stars with a pencil and tracing paper.

2.  Tape the tracing paper down to the foam core and shade over each of your stars with a pencil.  Carefully remove the tracing paper.

3.  Have either the teens pop holes in the foam core at the stars using their pencils or have the librarians pop the holes in with the x-acto knife.  For some of the constellations that had fewer stars we poke a few extra holes here and there for extra stars.

4.  Using the silver sharpie and a ruler connect the lines of the constellations using the holes that were made for the stars.

5.  Then the teens threaded their lights through the holes making sure that the plug of the lights will end up coming out of the bottom of the box.  A librarian then put a little hot glue at each light for reinforcement.

6.  The teens then used duct tape to attach the sides of the box.  Then have a librarian hot glue the back cover on to the box.

We also sent each teen home with an extension cord so that they wouldn't have to have their constellation wall art right on top of an outlet.


Tuesday, February 12, 2013

Story Time: Letter B

My coworkers loved my A is for Alligator story time and suggested that I find a Letter B craft and keep going through the alphabet.  After spending a few days google image searching I came across a B is for Bear craft on the blog Get 'Er Done, Momma!  The craft included a template but it wasn't the ideal size for me and one of the arms was reversed so I spent some time finicking around with it.  I was pretty happy with the end result.  I pre cut the letter B and the bears limbs out of regular paper and handed out glue sticks and crayons so that the kids could draw bear faces after glueing everything down.


For story time I read 4 books and stuck with the Alphabet Song and the Hokey Pokey.  I decided that the best way to handle letter of the alphabet story times was to do two alphabet books to reinforce the alphabet as a whole and to alternate the alphabet books with two stories about objects or animals that start with B one of which would hopefully be related to the whatever the craft was going to be; a bear in this case.  The books were:

Alphabet Under Construction by Denise Fleming

Bears on Chairs by Shirley Parenteau

Augie to Zebra by Kate Endle

Small Bunny's Blue Blanket by Tatyana Feeney

Small Bunny's Blue Blanket, while an amazing story just didn't go over well. I almost felt like the story was too slow and subdued for my group. They loved Alphabet Under Construction with it's huge letters. The kids often called out the letters and then I repeated it and read the caption. Augie to Zebra was less popular because the letters were so much smaller. Bears on Chairs, while not as popular as Alphabet Under Construction was great because we managed to get a lot of interaction out of the story.


Tuesday, February 5, 2013

Crafty Kids Styrofoam Cup Snowman

For January's Crafty Kids I decided to plan a Snowman Craft mainly because I wanted to do one before winter was over.  I did a google image search and found a ton of different versions of this craft.  I ended up creating an amalgamation by taking various components from several different images.


Styrofoam Cup Snowman
Materials:

2 Styrofoam Cups
2 Googly Eyes
1 orange pipe cleaner
1 large brown pipe cleaner or 2 small brown pipe cleaners
1 other half size pipe cleaner
2 pomm pomms
6-8 black paper dots  OR black construction paper
3 or 4 sequins
1 strip of felt, long enough to wrap around cup and double knot
Glue Stick

1.  Fold 3 fingers into the end of each of your brown pipe cleaners.  Stick them into the sides of one of your styrofoam cups.  Inside the cup bend the ends and use a small piece of tape to keep them stuck in place.  This will be your snowman bottom

2.  Fold your orange pipe cleaner, leaving one side slightly longer.   Twist your pipe cleaner together.  This will be your carrot nose.  Stick it into the middle of one side of the other styrofoam cup.  This will be your carrot nose.  Bend the pipe cleaner on the inside and use a piece of tape to keep it in place.  Glue the googly eyes over the carrot nose.  

3.  Take your final pipe cleaner and bend it into a U-Shape.  Stick each end on one side of the snowman so that the U goes over what was the bottom of the cup and the carrot is more or less in the middle.  Make small bends in the pipe cleaner on the inside of the cup and use a piece of tape to hold them in place.  Glue pom poms on each side of the pipe cleaner.  These are your earmuffs.

4.  Glue sequins down the front of the bottom half for buttons.

5.  Glue black paper dots on the front for a mouth.

6.  Glue the top and bottom cups together.

7.  Tie the piece of felt around the cups gently over the seam of the cups.  Cut some fringe in to the ends to create a scarf.

Tuesday, January 29, 2013

Story Time: Letter A

So my very first story times were designed by my coworkers.  When the September rolled around and Fall Story Time started I was finally given the opportunity to design my own story time crafts.  I decided to go with an alphabet craft based on a parent's passing comment.

The letter A seemed like the most obvious place to start.  I did a google image search and came across lots of A crafts, but my favorite by far was the craft that turned the capital letter A into an alligator.  I found a full page print out of the Letter A cut it out and used it as a stencil to to cut out green letter A's, then cut small white and green triangles for eyes and teeth.   I also handed out crayons so that each of the kids could draw eyes into the green triangles and write their name on their alligator.


I read 4 books and did 2 songs.  For this story time I picked three alphabet books and one story book that focused on something that began with the letter A.  I also do the alphabet song and the hokey pokey because it helps get the wiggles out.

For the letter A story time I read: Max's ABC by Rosemary Wells
                                                    Alligator Alphabet by Stella Blackstone
                                                    Chicka Chicka Boom Boom by Martin Bill Jr.
Apple Farmer Annie by Monica Wellington


The Max and Ruby book was by far the most popular of the four books, and Chicka Chicka Boom Boom would have been more successful if I had gotten more of the kids to say the words along with me.  The other books were fairly well received.  All in all it was a good story time for my first time handling the whole thing.

Tuesday, January 22, 2013

Teen Craft: Glowing Jar


I was flipping through Instructables two years ago and came across this amazing project for a glowing sun jar.  I was completely sure that the teens would love the program but it required soldering which I 1.  Have had several horrible experiences with
and
2.  Soldering didn't feel like something I could pull off with a group of 20 teens ranging between 7th and 12th grade if I had to run the program by myself.  (This was before Maker Spaces gained popularity in the library)

However after looking through the instructable I decided to see if I could doctor it to make it more manageable for both myself and a large group of teens.

Materials:
Solar Powered Garden Lights (See photo on the left, these are ideal)
Wire Bale Glass Jar (jars in photo are not correct jars)
Glow in the Dark Paint (See note)
Foam brushes
Epoxy E-6000 Adhesive
Tin Foil
Hair Dryers
Packing Tape

1.  Paint a thin layer of glow in the dark paint on the inside of the jar.  Once finished hit the inside of the jar with the hair dryer until the paint is completely dry.  Repeat two more times for a total of 3 coats of paint.  If your initial coat of paint was thin it will be easier to apply subsequent coats of paint.

2.  Take a piece of tin foil, fold it into a square and stick it in the bottom of the jar.

3.  Unscrew the top of the light from the stake.  You don't need the stake for this project, you can either throw it away or save it for another project.  Unscrew the plastic from the garden stake as well.  It will just be a bare bulb hanging from the top.  Using the Epoxy glue the solar light into the top of the jar. Use two pieces of packing tape to hold the solar light in place until the adhesive dries and let the kids know that it can take up to 24 hours for it to dry.

Note:  I used Michael's paint on the test jar which is more green and ghoulish looking however it seemed to melt in the extreme summer heat over the course of the summer, I have since used paint purchased at Home Depot which seems to hold up better over time


Tuesday, January 8, 2013

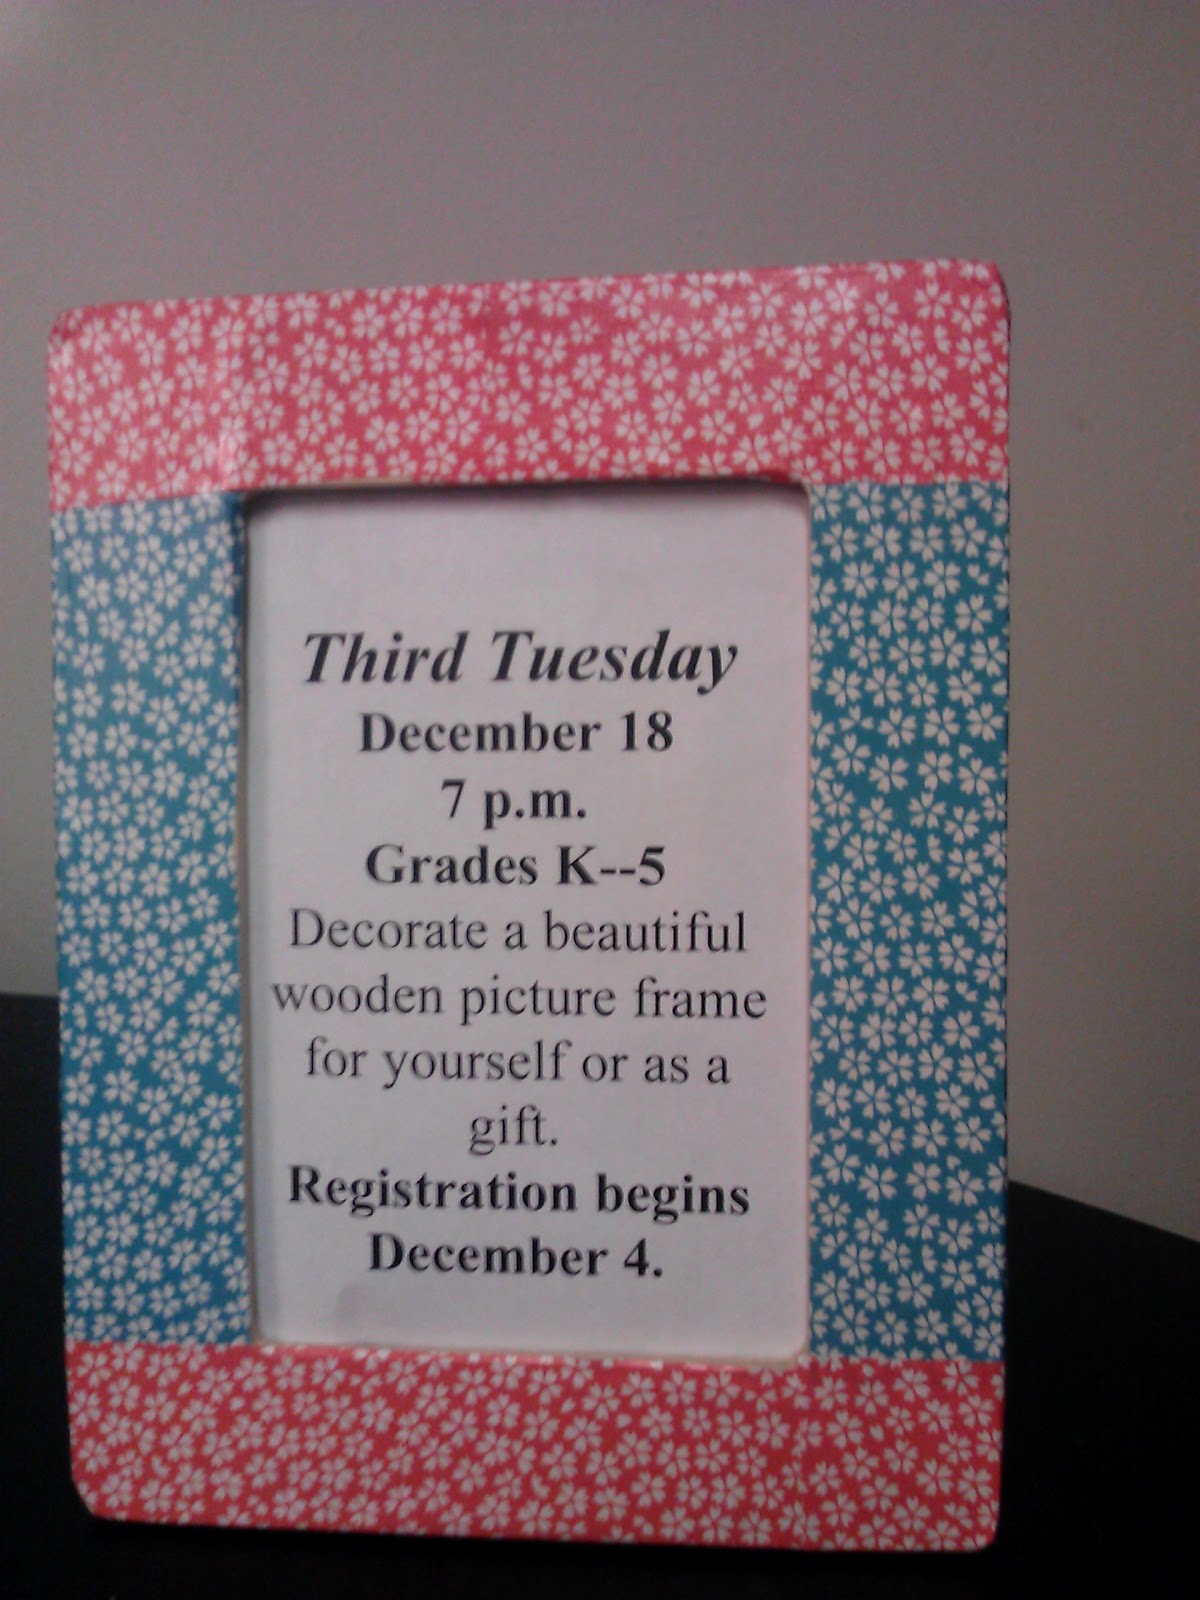
Crafty Kids: Decoupage Frames

One Tuesday a month I run an evening craft program.  It is essentially a drop in although we do have a sign up for it.  It's listed as open to kids in first through fifth grade, however I am not terribly rigid with those rules.  If parents want their younger children to participate they are expected to stick around and help their younger children with the craft and if sixth graders want to do the craft they are expected to be respectful of the little ones.

For December's Crafty Kids (originally it was called Third Tuesday since it usually takes place the third Tuesday of the month, however after a scheduling mishap I suggested a name change) I decided to have the kids decorate frames that they could either keep for themselves or give to someone as a holiday gift.  Since attendance at this program varies greatly from month to month I wanted to use supplies that could be re purposed if they weren't all used up, so I had the kids decoupage their frames with origami paper, but you could also use old magazines or scrap booking paper.  Whatever is lying around that's pretty or cool.


Supplies
1 Frame
Modge Podge
Foam Brush
Origami Paper
scissors

ribbon (optional)
Instructions

1.  Each child gets a frame, some modge podge in a cup, foamy brush and at least two sheets of origami paper (you need minimum 2 sheets to cover an entire frame, if the child wants to use more than 2 patterns then they will need more than 2 sheets)

2.  Have the child plan out what they want to do and cut the origami paper into appropriate sized pieces.  They will want to cover the front and the edges.

3.  Coat a section of the frame in a thin layer of modge podge, then place the origami paper onto that section and smooth out any wrinkles or creases before that section dries.  Then move on to the next section.

4.  Once the entire frame is covered in the origami paper paint another thin layer over all the paper to seal the frame. (See optional step 5) Then let dry.


5. (Optional I've only done this step when I was running the program with teens and tweens as a drop in as it feels a little bit finicky for smaller fingers.) After you have painted a thin layer of modge podge all over the paper, take a piece of ribbon and wrap it around the edges of the frame. Paint another thin layer of modge podge over the ribbon and let dry.

Wednesday, October 21, 2009

Rainy Day Activities


I don't know what everyone else's weekend was like, but here all it did was rain. Of course this made me remember one of my favorite rainy day activities, paper craft. Paper craft is the art of cutting and folding paper into fun shapes. My favorite papercraft site is Cubeecraft. They provide fun full color templates that you can print, cut out and fold into your favorite video game, movie, cartoon and book characters, such as Mario Bros, Scott Pilgrim, various incarnations of Batman and the guys from Ghost Busters. They also have various inanimate objects, such as the mushrooms from Mario Bros, and pretty much every video game console.


Each item is marked with a difficulty level between one (the easiest) and five (the hardest) scissors. A thicker paper is recommended for this; I used 24 lb paper. You can use regular paper, but it is much harder. You can use scissors to cut everything out but it is much easier to use an exacto knife to cut the slots, and also make sure to put cardboard or some kind of mat underneath your paper, so you don't cut tables or floors. Also double check the printing directions on the site, if you aren't careful you could end up losing tabs (that's why my mushroom is a little bit crooked).